 During midgame, you master the intermediate and advanced level maps. It’s much more dangerous, but it also has a higher monster reward and a faster experience gain.
Useful advices
- Use the
Cursespell (only found on scrolls), which reduces enemy damage to the minimum possible. The regular (not elven) version of this scroll costs only 300 gold, but allows you to fight very strong monsters, such as ogres and trolls. It’s also worth using these scrolls on dragons too… - Use not only the regular heal scrolls for 50 gold, but also the elven version for 3000; they heal much more effectively and allow you to defeat the strongest enemies, which gives access to good equipment.
- The most dangerous enemy spells belong to the spheres of fire and water.
- Many high-level monsters can turn you into stone – cast a stone curse spell that deprives your hero of the ability to move and attack; you can only drink potions in such state. Use protection scrolls against earth magic to avoid this affliction.
- A swarm of bats can kill a hero in seconds. Use a fireball to cover the whole pack with a single spell.
- Mages, instead of protection and armor, may want to look at equipment, which increases the health parameter.
- Some spells, like weapons, have no effect on flying creatures. These include both the wall of fire and the wall of stone.
- A blow from a fireball destroys some amount of the poison cloud; if you’re choking on fog, you can pound it with fire…
- To use the “summon” spell, you need to click on the hero himself, not on the area.
- Maximum resistance to magic depends on the “spirit” parameter. Every 2 units of Spirit add + 1 resistance to all elements. Each class has its own maximum limit of protection against the different elements, see table.
The first thing worth talking about is how to use the healing potions. They cost very little and restore only 1 life. But don’t be too quick to give up on them. The point is that these potions you need to drink like this: hold down the key, on which they are binded (eg F8). Then when a lot of damage incoming at you, you quickly restore your health by drinking a few dozen potions at a time. Just hold the button 😉
Now a little emphasis on some spells.
A Darkness spell that some monsters conjure, combined with the Wall of Fire or with Poisonous Mist, give the most dangerous effect – they cut off the speed of movement to about zero. That is, the character begins to fiercely stall. And it takes ages to teleport from this state. While enemies stay at the same speed. This, by the way, is also true in the opposite direction.
Particular attention should be paid to the spell of summoning animals. You can summon several animals in a row, but only first one will stay forever – the rest will eventually disappear. The summoned animal can be covered by buffs. Maximum level of summoned animals is 4. For this you need either 75 astral or elven scroll. Then there’s only one question – what’s the turtle got to do with it?
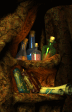
Potions from the tavern
In RoM2 the characteristics are increased by special potions. In slang this process is called “boost”, and the character, respectively, can be “boosted” and “not boosted”.
There are two mechanics that can put in your bottomless backpack coveted potions of colored substance.
- At the beginning of the game you can buy boosting potions in the store. On the #2 server you can buy potions for 150 gold, which improve reaction and potions for 4000 gold, which will improve the spirit parameter; on the third server you can improve all parameters to 25, etc. (see table)
- Tavern Quest Potions; these are only available on server #6. These potions are usually very difficult to obtain, or can be bought from players. But they cost a pretty penny.
 When completing a tavern quest, it is important to understand the mechanics of reward formation. For most quests the more difficult the quest, the higher the reward will be given. Also some rewards can be given only when you character got enough experience itself – the player must cross a certain experience milestone. For potions from tavern quests this milestone is 18 million experience. Once you have gathered the right amount, you can take quests to intercept a dragon/kill a dragon and intercept a group with a dragon. We’re talking about a level 4 dragon, of course. The reward will always be a random stat potion.
It’s important to understand that the corresponding prop will stop appearing in the inn as soon as you max out your characteristic. Therefore, if you plan to seriously bootlegging, you should leave 1 free point in each characteristic in order to get potions of all types.